
Now we will look at individual plan reports, in order to do that we will select a plan from the list that we have generated previously from our Advanced search tutorial.
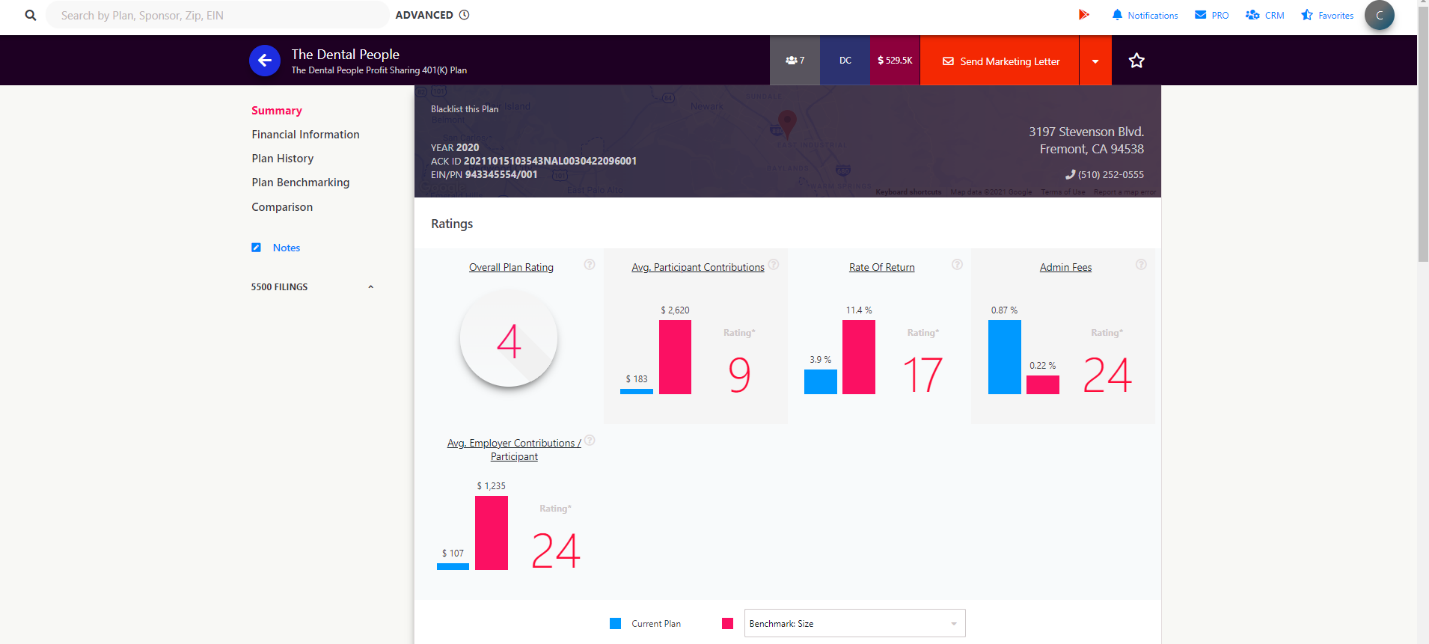
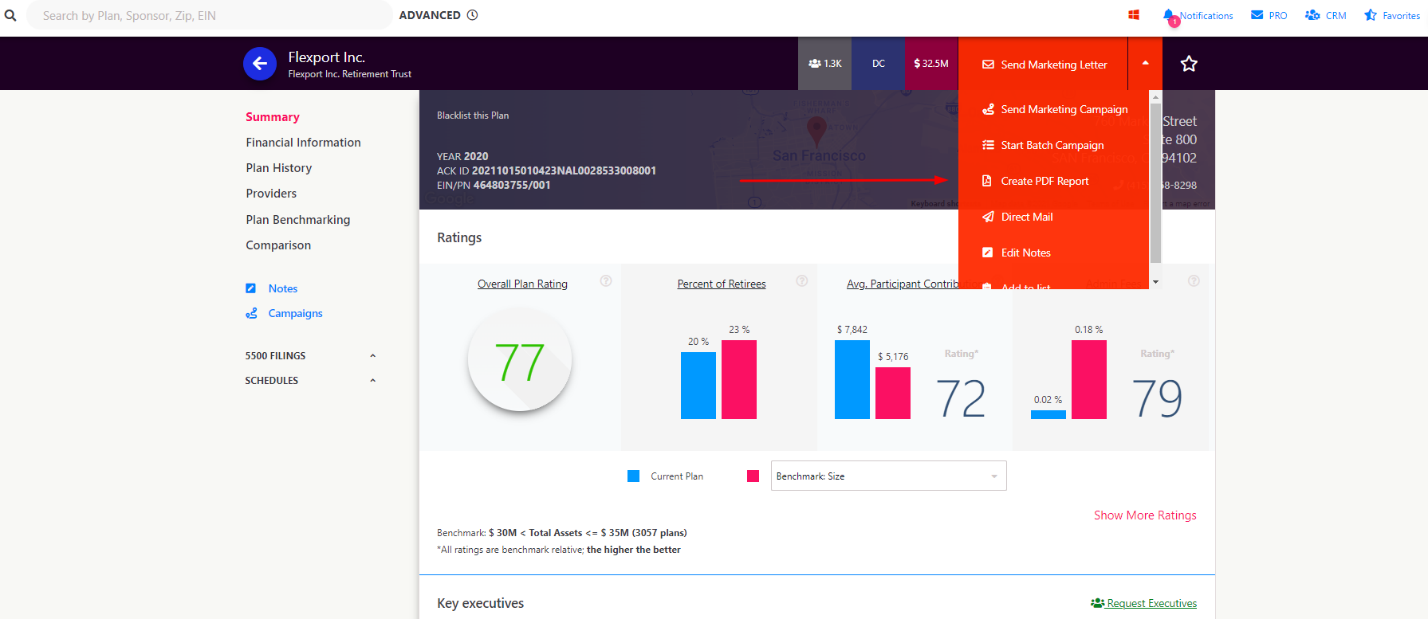
Step 01 : Once you click on a plan, you will be automatically directed to the Summary page report, what that is, is a brief overview of how the plan is performing – On the top we have the name of the plan, the total number of participants for the plan, the type of plan and also the ability to send an individual Marketing letter…Something that we will talk about in a different guide.

Step 02 : Now if we scroll down a bit, you will see the overall rating for the plan, if you hit the “Show more Button” it will expand all the factors that LE is taking into consideration to calculate the overall plan rating.
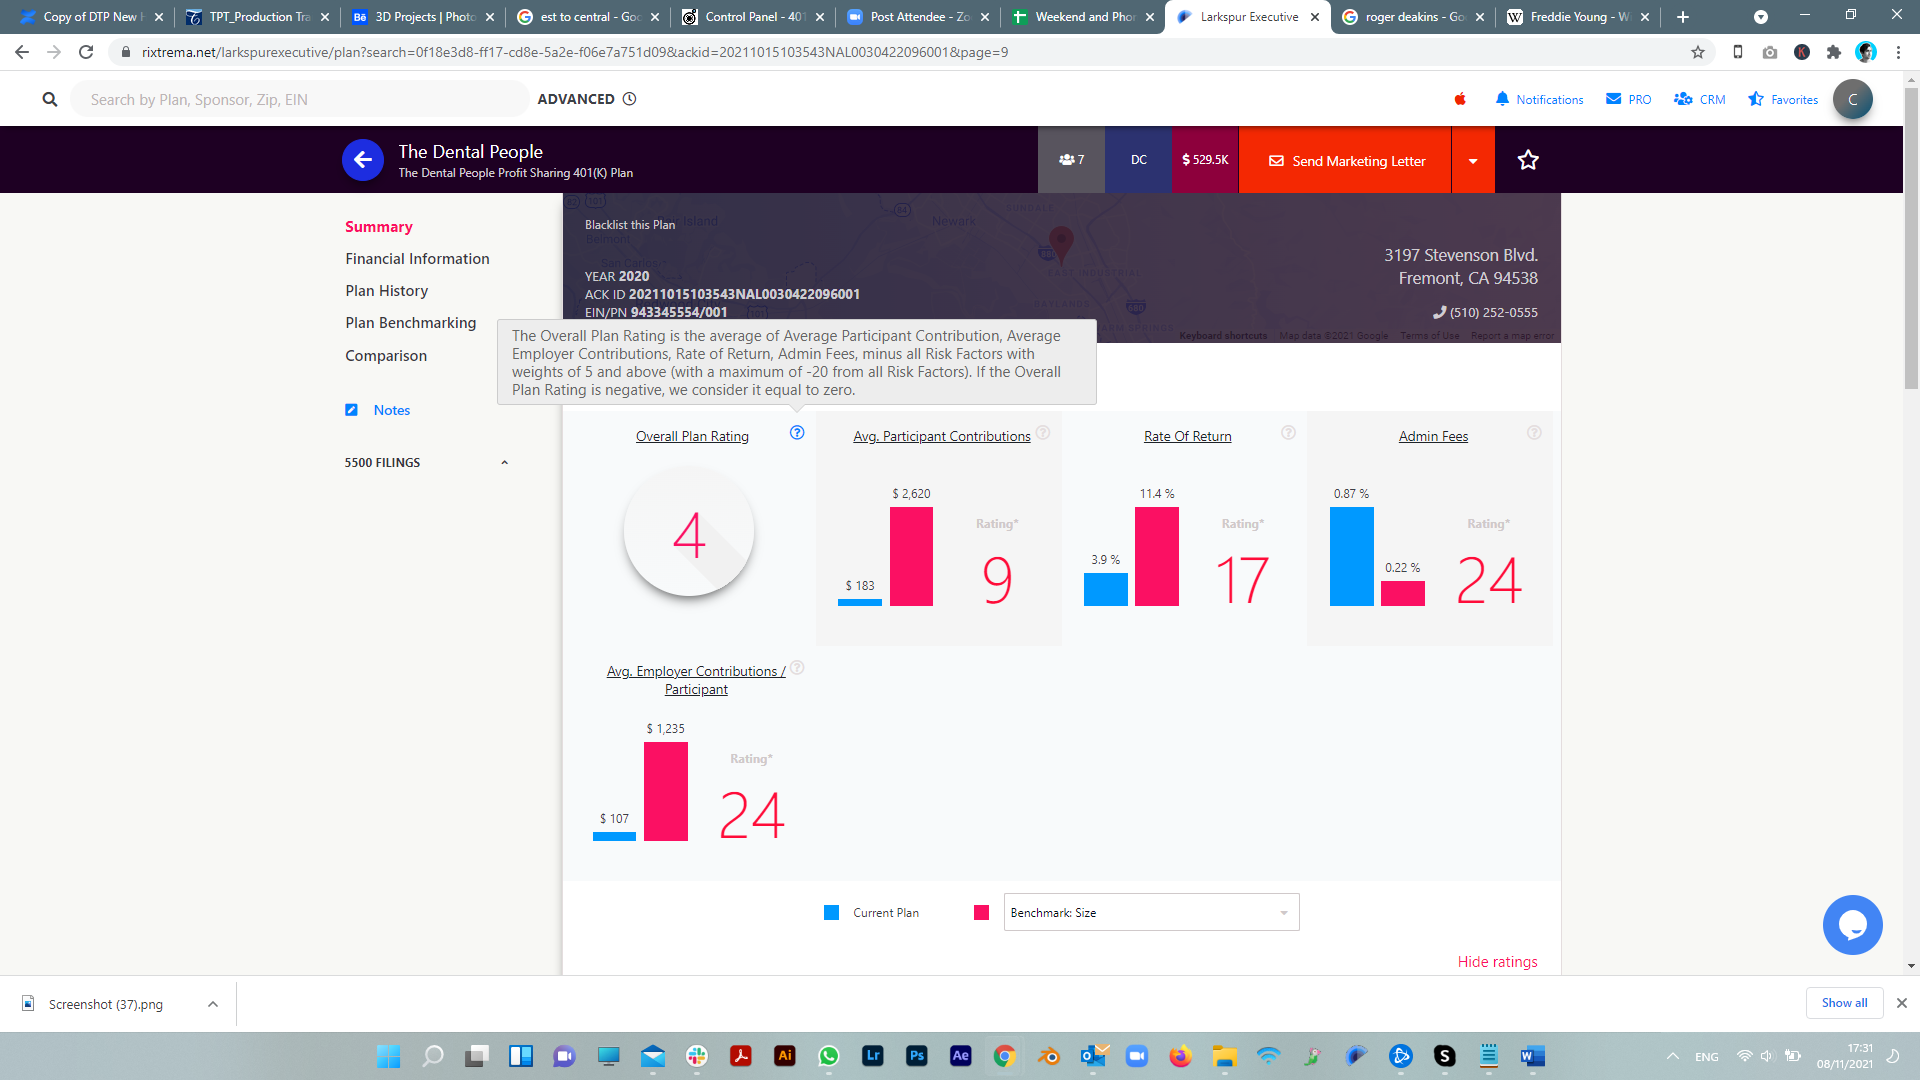
Step 03 : Now if you Hover over the “Question Mark Icon” – A popup will explain the methodology behind the calculations. The Blue bar on the left is representing the current plan in use and the Red on the right is an average of all the other plans of similar asset size. I say size because the benchmarking we are using currently is Size. We have the option to Cycle through three benchmarking systems – Size, State and Business, You will notice that when you select a different benchmark, the rating changes.
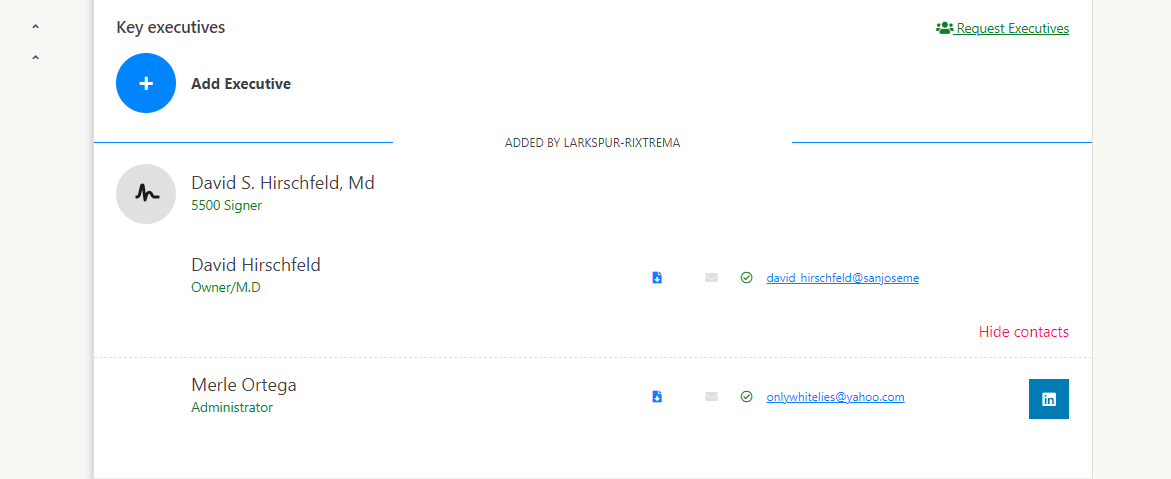
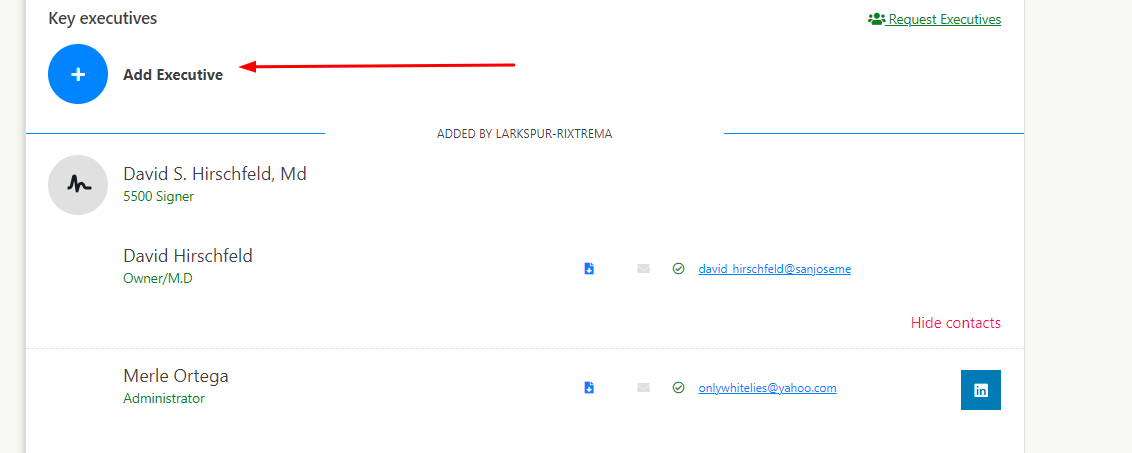
Step 04 : Now if we Scroll down, you will see a list of Contacts that are available, Hit on “Show More” and you will get the whole list of available contacts along with their verified emails and their LinkedIn Profiles.
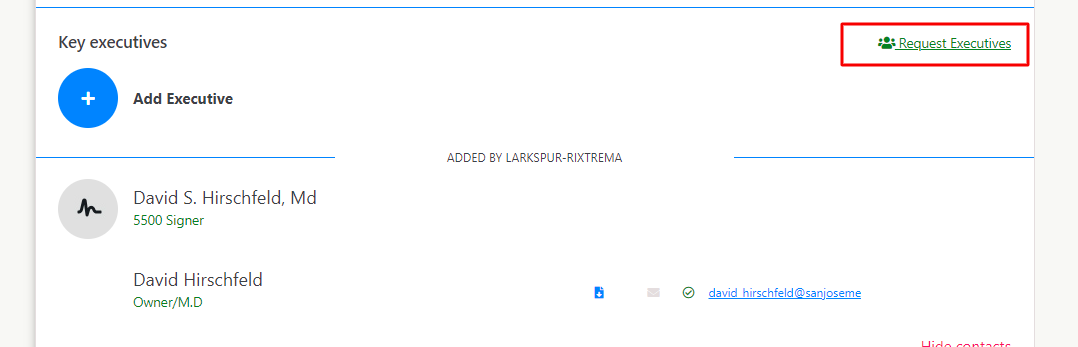
Step 05 : But if you feel that you don’t have enough contacts for a particular plan then you can click on the “Request Emails” Button – What that does is that it sends a request to our inhouse Data team, who then look for more verified contacts and email addresses. It usually takes them 24 – 48 hours to fulfil that request.
Step 06 : You may also add your own contacts by clicking on the “Add Executive” button. It activates a Pop up form, which once filled adds a contact for that particular plan and is only exclusively available to your profile.
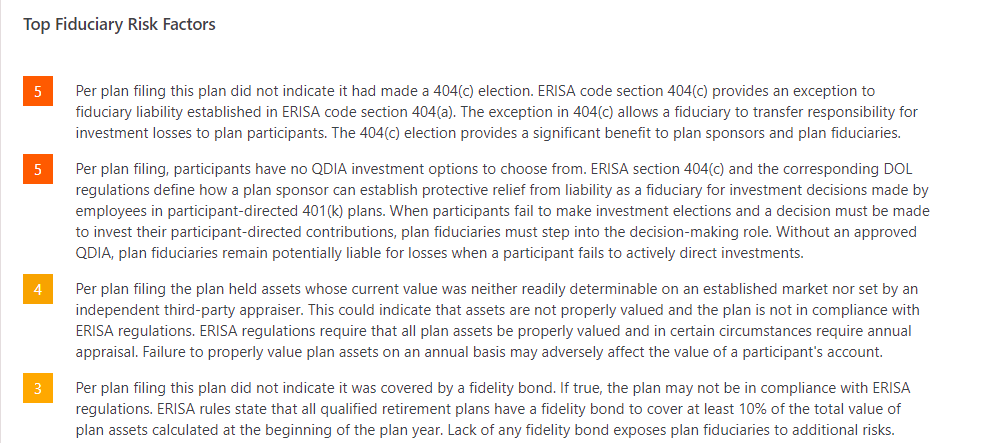
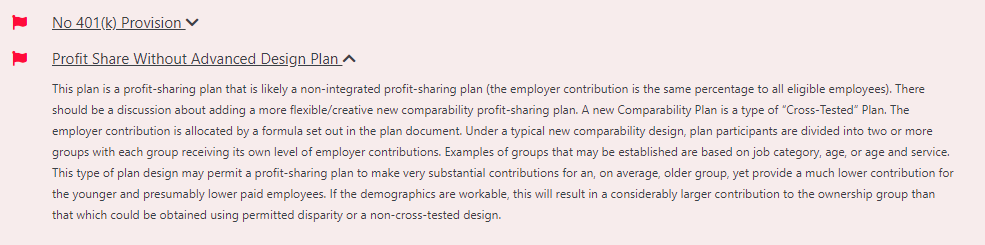
Step 07 : Now if we scroll down further then we have a list of TOP Fiduciary risk factors, they are similar to red flags, the major difference being that they are rated from a 1 to 10 and anything that is 5 and Above is considered a major risk factor and they are deducted from the overall plan rating. For example here we have two major risk factors one is rated at 5 and the other one is a 10. So the overall plan rating would have been 26 but its stands at 11 because he system is deducting 15 points from the Overall rating.
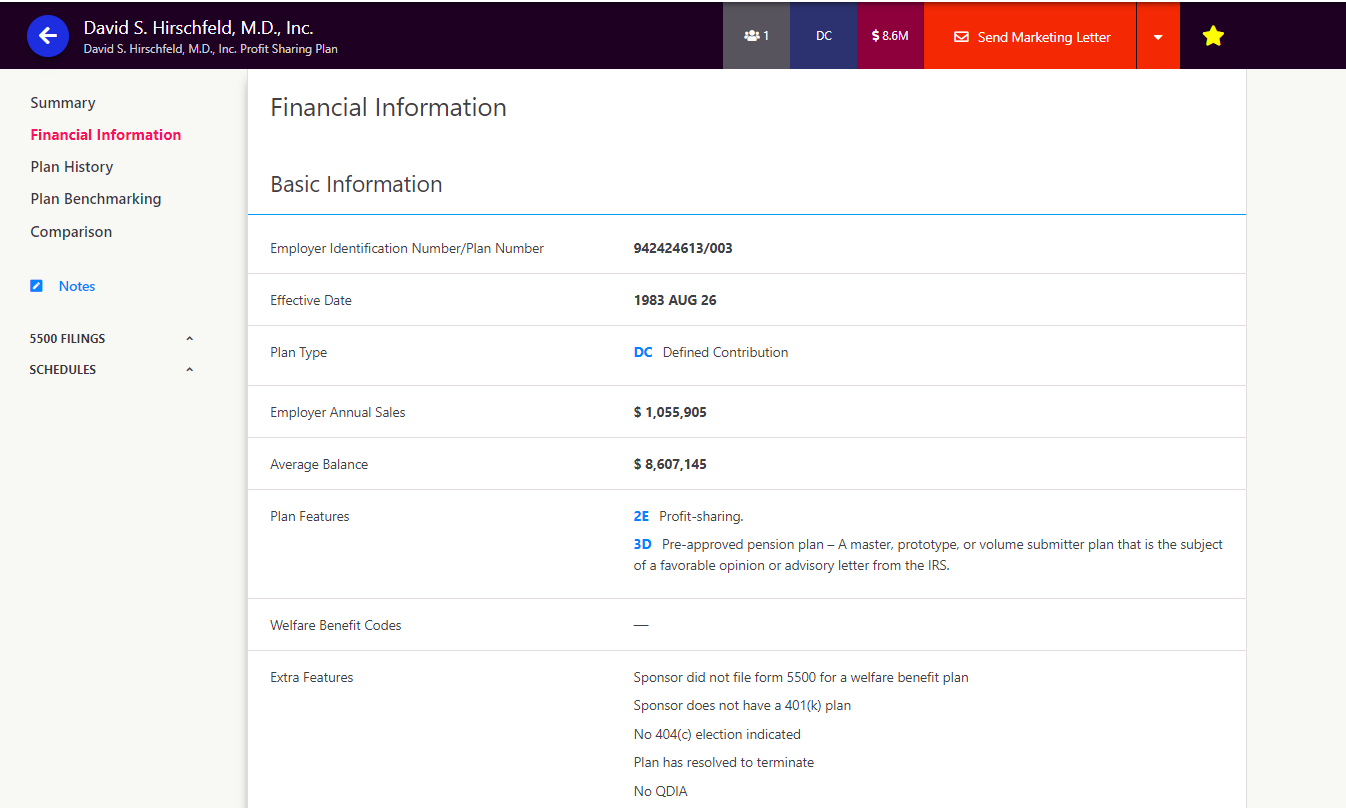
Step 08 : Now lets see what other reports we have available to us, we have the financial information report which is where all the financial information for the plan to be found in the 5500 filing is consolidated in one place so that you can have a quick overview of the plan, should you need to do so.
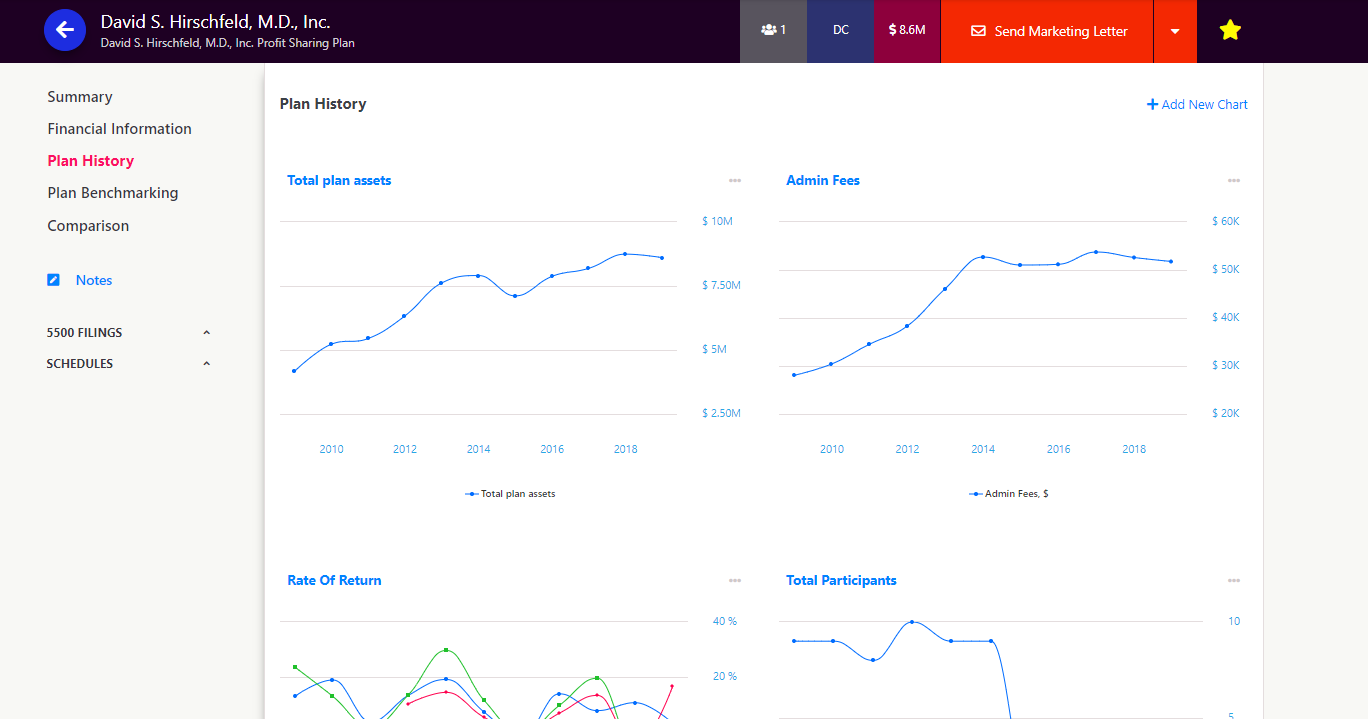
Step 09: The Plan history report is interesting, its a graphical representation of how various aspects of the plan has performed over the years. All of these can of course be exported as a PDF report or sent as an email to your prospect.
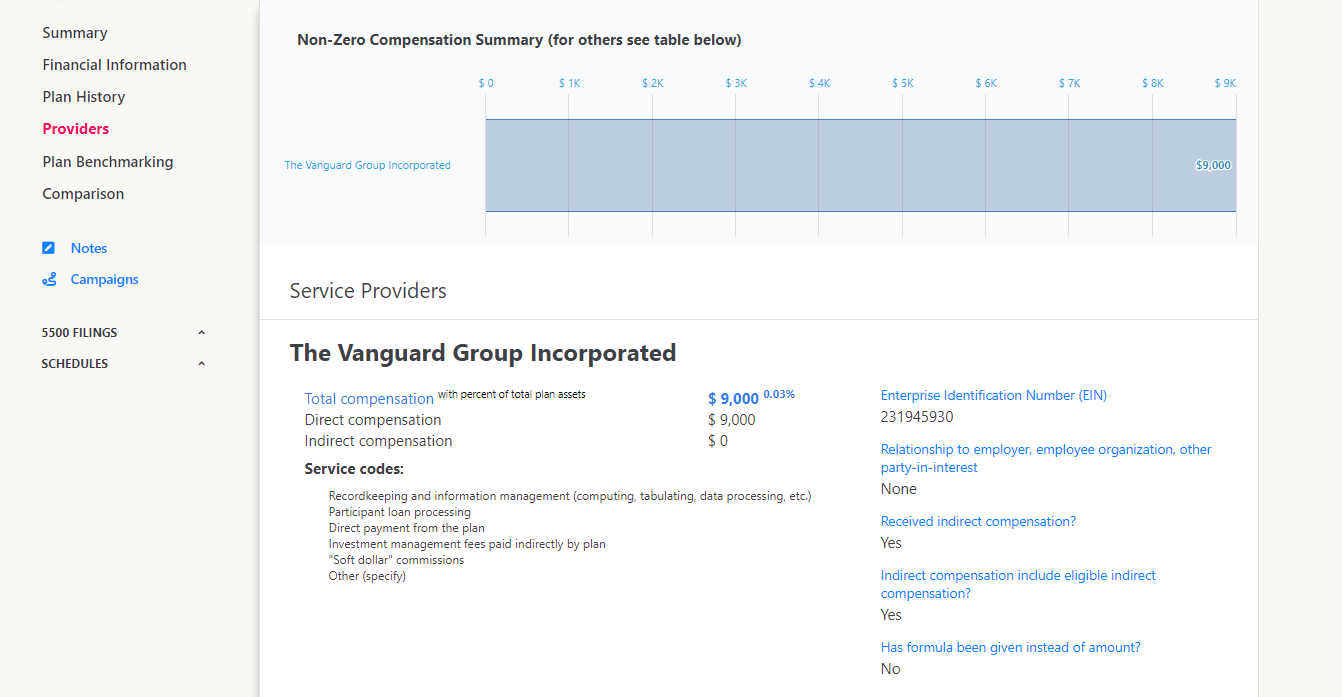
Step 10 : The providers list is where you can find a list of providers that were disclosed in the 5500 filling, the services they provide and the commission that they earn.
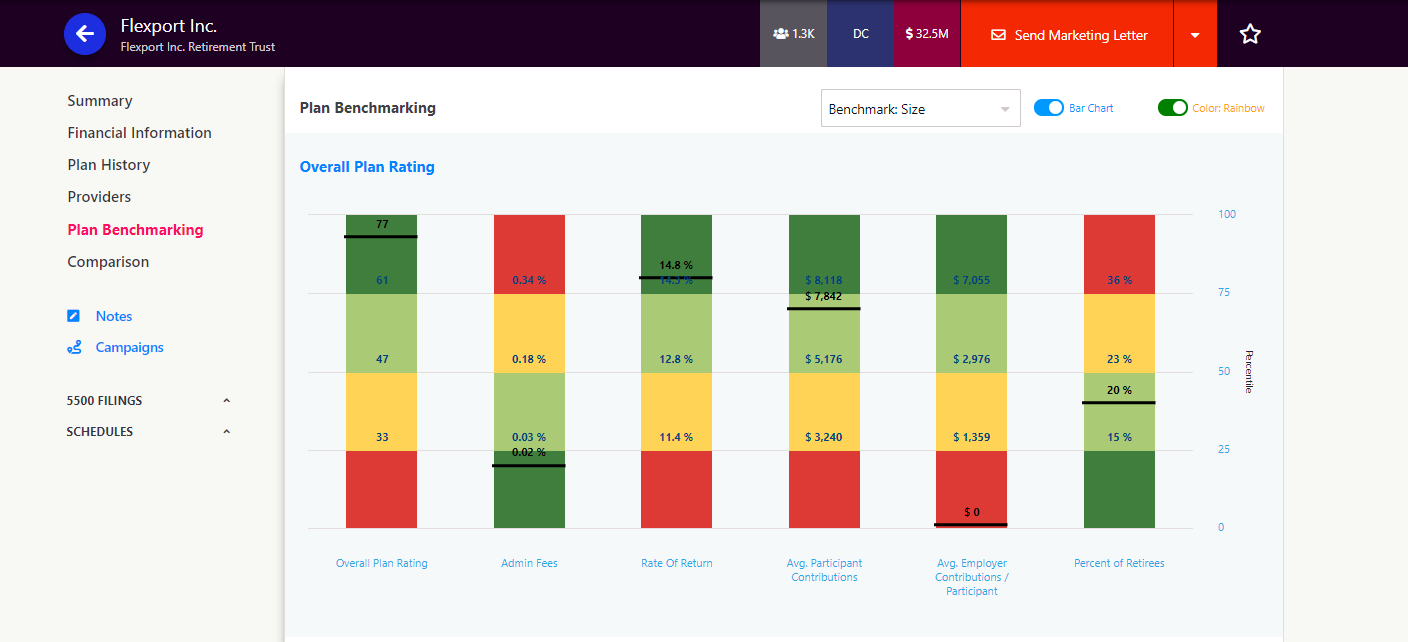
Step 11 : The plan benchmarking report is kind of the backbone of the overall rating system, it shows where the current plan stands when its compared to other plans of similar asset size. We say size again because the benchmarking is set to size, we can change the benchmarking from here as well or we can change the switch to a different kind of graph which shows were each aspect of the plan stand when compared other plans of, again – Asset Size.
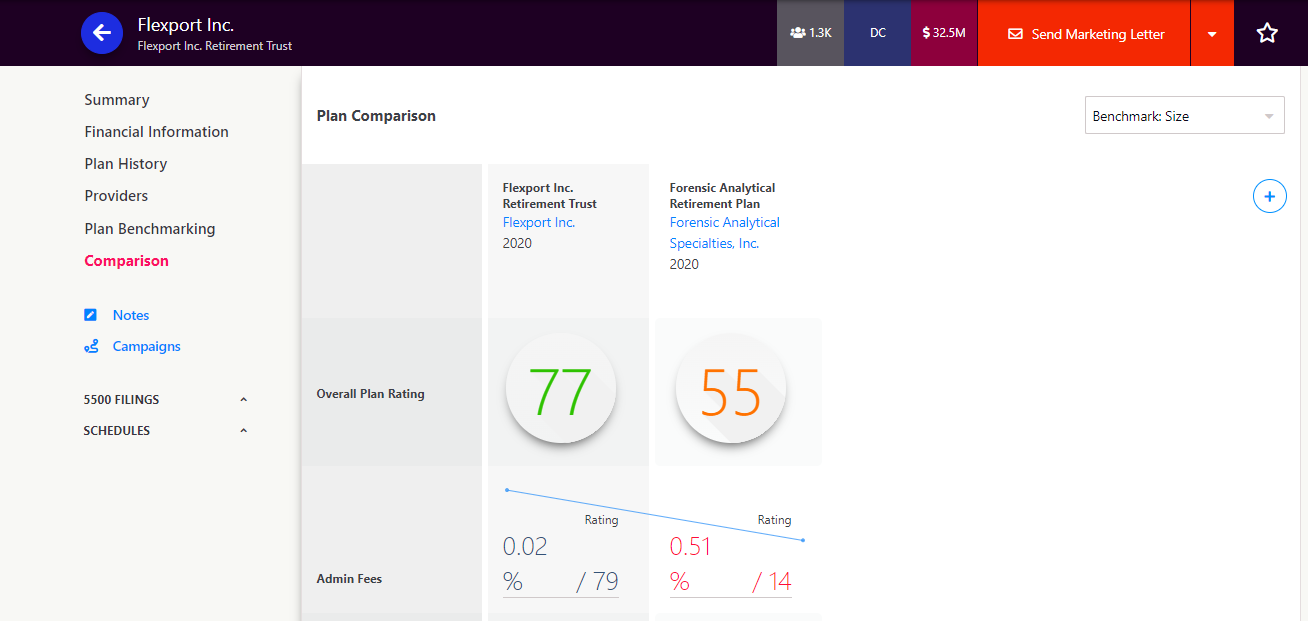
Step 12 : Lastly we have the option to Compare a Plan to their competitors – We can add a plan for comparison and stack them against each other to see how a rival plan might be performing comparing to the current one.
Step 13 : All of these, again , can be exported as a PDF report – We can click on the drop down menu next to the “Send marketing Letter” button and then click on Generate PDF report – That will activate a popup menu which has all give us further option to include or exclude various report. We will keep the size at a4, We can also upload our own logo and add our own disclosure. Once you are ready then hit on the generate PDF report.
That concludes our Quick guide on internal reports pages for individual plans within Larkspur Executive, for more tips and news please visit Rixtrema.com or email us at Clientsuccess@rixtrema.com. – Happy prospecting!